Showing posts with label braids. Show all posts

Wednesday, May 12, 2010

Hairstyle How-To: 4 Strand Box Braid

Most of us can do a 3 strand braid without too much difficulty. The idea of learning how to do 4 and 5 strand braids is both intriguing and sometimes daunting.  I know it was a daunting idea for me, even 3 years ago.


I am one of those people who is truly all thumbs.  My typing is slow, my fingers aren't nimble--I feel as though I have no dexterity.


Yet, I was so charmed by the look of the 4 strand box braid and the 5 strand flat braid that I made it my business to learn how to do them, no matter how long it took.


I started learning each braid by doing it as a half-up braid.  Having less hair to work with seemed to make it much easier.  Also, doing a half-up allowed me to have a decent sized braid with more plaits than if I tried to braid the length of my hair.


It took me at least a week to learn the 4 strand box braid. It was really something new to try to figure out the fingering, even though I had the pattern firmly in my mind.


I remember that I would attempt making that 4 strand braid, and I would get a few rounds into it and then make a mistake.  I would then start over.  As soon as I felt the least bit frustrated, I called it quits for that day.


Yet, day by day, my fingering got better.  The muscle memory was beginning to get there.  Finally one day I made that 4 strand box braid in a half-updo!  After that, I knew how to do it forever.


The pattern for the box braid is very easy. It's a really nice looking braid because it has a 3-dimensional quality. 


1. Divide the hair in 4 equal strands.  


2. Mentally number the strands from left to right: 1, 2, 3, 4.  


3. Take strand 1. Bring it under strands 2 and 3 and then over strand 3.  It will now sit in the strand 2 place.


4. Take strand 4.  Bring it under strands 3 and 2 and then over strand 2.  It will now sit in the strand 3 place.


5. Rename the strand again from left to right, 1, 2, 3 and 4.  Repeat steps 3 and 4 until the braid is done.


If you have trouble with this, don't worry.  You are using fingering that you're not used to.  Yet I guarantee that with practice, anyone can do this.  You just need patience, and don't be frustrated if you don't learn it in a day.


Once you learn it, you will be able to start doing it in a French style too.  


Here is a photo of my 4 strand box braid half-up. It is held with a Scunci Ouchless Invisible elastic.  They're made of silicone, and I find them to be quite hair friendly, although they need a bit more care to remove than the regular Scunci elastics that I talked about earlier this week.


Have fun braiding!

Monday, May 10, 2010

Hairstyle: Faux Coiled Braid--First Attempt


Today I tried this hairstyle for the first time.  I call it a "faux" coiled braid because it's actually 3 separate braids, one coiled around the other.  I'm surprised at how big it looks, even at my current length.

This is a surprisingly easy style to do.  It simply requires making 3 single braids, one under the other.  Then I coiled the top braid and pinned into place.  After that I coiled the braid immediately underneath it around the first coil.  The bottom braid was then coiled and pinned around that.

Since this was my first attempt, it's not as neat as I'd like, but I want to post a photo anyway. 

I'm fairly pleased at how this turned out and how easy it is.

I'll post a tutorial with photos in a future entry.

Thursday, May 6, 2010

Hair Style: Boho Nape Knot

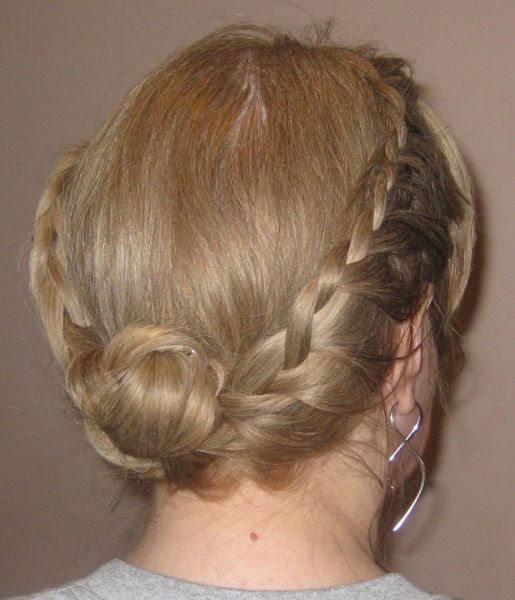
Today I'm showing a photo of a boho-style nape knot. 


I lace-braided each side of the hair, and then combined the sides with the rest of my hair.


Then I made a loose braid.  After that, I rolled up the braid and pinned it into a chignon, or low bun.  


This is a quick and easy hairstyle, provided that you can lace-braid.  I originally learned how to do this braid from the book Beautiful Braids.  When the braid is done in the manner of this styles, it's also known as the Face-Framing braid.  Lace braiding is similar to French braiding.  The only difference is that instead of adding hair to both the inner and outer strands of the French braid, you just gather new pieces of hair from the side closest to the face. These pieces are added to the outer strands of the braid.


I'll be adding this to my Updo Gallery on my website when I get some better photos.  Or maybe it should go in the Braids Gallery.  I'm not sure.


I hope you like this casual updo.  It's a great look for summer, and very comfortable.

Sunday, May 2, 2010

French Braids Can Be Handy

Knowing how to braid is certainly not essential to having long  hair, but it certainly can help make your hairstyle repertoire more  interesting.

Whether you choose a braided hairstyle or whether you use an accent  braid or two to a regular bun, you can add more panache to any  hairstyle.

Most people can do a simple three strand braid.  With a little  practise, it's not difficult to learn how to French braid.  That  simple knowledge can really spice up the way you wear your hair and  can help to prevent feeling the boredom that some people experience  when wearing updos day after day.

Once you've mastered a French braid, then it is very little trouble  to learn how to make an inverted French Braid, which most people  refer to as a Dutch braid.  The only difference is that as you make  your three strand braid, instead of crossing the outer strands over  the middle strand, you cross the outer strands UNDER the middle  strand.
The difference in appearance between the Dutch Braid and the French  Braid is striking, and both are just as easy to make, but you've  now doubled the various braided looks that you can choose from.

Later, when you're more comfortable, you can learn more complicated  braids, but once you've learned the basic three strand braid, you  can really vary your look.

French braiding can also be handy to anyone growing out bangs.  I  found that an invaluable tool when I was growing out my own bangs.   I was able to French braid just the top of my head, and it didn't  even appear that I was in the bangs grow-out phase.

Braids can add elegance to a style, or on the contrary, a casual  bohemian look, depending on how you put it together.

Your hair doesn't even have to be that long to begin learning to  French and Dutch braid.  If your hair is long enough to pony tail,  it's long enough French braid.   I suggest that if you don't yet  know how, then learn.  It's a very handy thing to know.

Wednesday, April 28, 2010

Protect Your Hair With Style

It's sunny but very windy here where I live today. The wind put my mind to just one of the reasons that protective hairstyles are important for longer hair.

Many people with long hair wear it down all of the time, because they like it that way.  I like to wear my hair down too, but wearing hair loose exposes longer hair to additional friction against one's clothes, being whipped by wind, and other wear and tear.

If you plan on growing your hair to mid-back or longer, it's a good idea to learn some easy protective hairstyles to wear not only most of the time, but especially when you're out in the elements.

We've all experienced those beautiful car rides in lovely weather, when the wind whips through our hair.  It feels good, but in the end, there are a mess of tangles left in the hair, which can lead to breakage. 

Then there are the more delicate areas of the hair.  First of all, the ends are delicate and more fragile than the rest of the hair, as the ends are the oldest and have been exposed to the environment for longer.  When you think about it, hair that doesn't yet quite graze the shoulder is already two years old at the very ends.  On average, every six inches of growth beyond that represents another year.

So we must protect those ends from too much wear and tear.

Secondly, the top part of the hair that grows around the crown is also more fragile than the rest of the hair.  We call this part of the hair the "canopy".  It's the part of the hair that you use if you make a half-up hairstyle.  It is the hair that is constantly exposed to sun and breezes if you're outdoors, and once again, it's the longest and therefore the oldest portion of your hair.

So we must protect the canopy as much as possible.

There are several ways in which you can contain and protect your hair that are quick and easy.

One way women have been protecting their hair for millennia is by wearing a simple, single braid.  It's easy to do, keeps the hair out of the way, and is protective.  If you don't like the idea of the braid rubbing against your clothes, you can wear a flipped braid as shown in my entry of April 26th, 2010.

Half-up hairstyles are perfect for when you want to still want to show your length but want to protect the fragile canopy hair.  You can wear a half-up bun or braid of just about any style you like, and it will help protect the hair that has most been exposed to friction and the elements.

Updos are among the most protective hairstyles of all, and I recommend wearing them most of the time, if possible.

Even when hair is at shoulder length, it's not too soon to start doing protective styles.  At shoulder length you may not be able to do a bun in your hair, but you will be able to make a French Twist, a Peacock Twist or a Gibson Tuck.  This is also a great time to learn how to French Braid, if you don't already know how to do so.  You can see examples of all of those styles in the Updos Gallery and the Braids Gallery on my website.

Half-ups can be done at any length as well, and are a wonderful way of not only protecting your hair, but of trying out updos that your hair may be too short for.  See my Half-Ups Gallery for ideas.

I will eventually be giving instructions here on how to do most of the hairstyles shown on my website.


Now of course there will be times when you're going out that you really want to wear your hair down and loose, and that's fine.  We all want to enjoy wearing our hair down from time to time. That's one of the reasons many of us want to grow it long.

Nevertheless, if you wear protective hairstyles most of the time, it will pay off with great rewards in the long run, giving you the freedom to wear your healthier-looking hair down for an afternoon or an evening out and even the occasional windy car ride.  And everyone knows; you're never too old for that occasional windy car ride.


Wednesday, April 14, 2010

Styling Longer Hair Without Causing Damage

When I decided that I wanted to grow my hair long, I knew that I had to stop using blowdriers, curling irons and hot rollers, if I expected my fine hair to be able to grow without damage.

This was a real challenge for me, as I am all thumbs, and not the least bit good with my hands.  I started trying to learn how to create styles that would not only look interesting, but also protect my hair and not require heat appliances.

The first style I learned was the French Twist.  I had often seen this style, but I didn't think I'd ever be able to do it myself.  But after reading a few tutorials, I was able to do it using just one little pic or comb to hold it up.  I then learned some other styles that worked with my length, such as the Gibson Tuck and a Tucked 3-Strand Braid.  All of these hairstyles can be found in the Updo Gallery of my website.

I had a book that taught me some elementary braids and updos.  I recommend it to anyone, no matter how much you think you may lack talent in styling hair.  It is Hair: A Book of Braiding and Styles by Anne Akers Johnson.  The styles you can learn in this book are the foundations for most more difficult styles that you may want to learn down the line.

As I said in an earlier post, until I was 45, I didn't even know how to use a hair stick.  I always thought that a bun held by a single hair stick was just a trick in the movies before I learned how to do one myself.  How happy was I to discover that it actually could be done!

As I became more and more interested in just what I could do with my hair, I began trying to learn more difficult braids.  I was able to do a French braid, but not much more.  My next project was to learn how to do a Four Strand Box Braid.  It took days for me to get the fingering down and to develop the muscle memory to successfully make this braid.

It took me even longer to learn a Five Strand Braid, but with patience and practice, I did learn how to do it, even a French Five Strand braid.  I think my happiest achievement was learning how to do a Crown Braid.  Again, all of these and more can be found on the Braids Gallery on my website.  All of the photos there can be clicked for larger images.

I've learned a lot since developing a knack for styling my own hair, including what hair accessories work best with each style, and that patience pays off.

In the coming days and weeks, I plan to give some tutorials on how to do some of the various styles I've learned, as well as discussing my favourite hair accessories, and what makes them superior to others.

I'm not the best stylist in the world, but I've been able to do things with my hair that I never thought I'd be able to do.

If I, who am not a dexterous person, can do it, so can you!  I'll leave you with a photo of the first style I learned, the French Twist. It is held in place with only a France Luxe Chignon Pic in the colour "South Sea".