Showing posts with label hairstyle photos. Show all posts

Sunday, May 30, 2010

Hairstyle How To: Franny's Easy Summer Updo

This is an easy summer style that is quick, easy, requires no twisting and requires no braiding.  It can be adapted for height, and the ends can be left loose as I have chosen to do, or they can be tucked under. Also, you can experiment with flipping the ponytail through more than once for a fuller topknot.


All you need for this style is a brush or comb, a ponytail holder, and a barrette or slide. A Topsy Tail Tool is helpful, but not essential.

Here are the instructions:

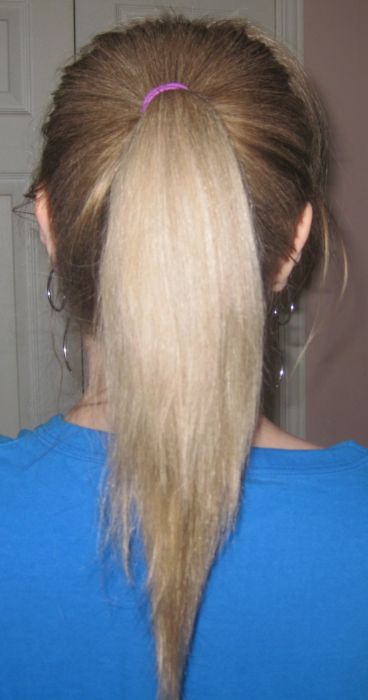
1. Put hair in a high ponytail.


2. Take Topsy Tail Tool and  insert it behind the hair elastic from the bottom, with the ponytail in the Topsy Tail loop.


3. Pull ponytail up behind the elastic with the Topsy Tail.


4. Now that you've pulled the ponytail through, hold it straight up and give it a gentle yank.


5. Pull ponytail down over the flip-through, smooth it with your hand and insert as small slide or barrette.  I am using a Flexi-8 slide that was given to me by a dear friend.

Lightly comb the ends, which are now likely disheveled, and smooth them.


6. The finished style.


Another view:

Monday, May 24, 2010

Hairstyle How-To: Gibson Tuck

I get a lot of requests for tutorials on my website for The Gibson Tuck.  It's a very easy style to do, and it can be done with hair that is shoulder length to very long hair, depending on your hair type.  Depending on your own hair, experiment with the height of the placement of the original ponytail.


1. Gather hair into a high or medium ponytail.


2. From the crown, use your fingers to separate the hair above the ponytail. You will essentially be creating a pocket for your hair.


3. Tuck ponytail into pocket. Try to distribute the hair evenly.


4. After the hair is tucked in, use a bobby pin or two to keep the elastic held down.


5. Now you have your Gibson Tuck, almost completed.  However you'll notice that the part where you made your pocket still shows.  We'll deal with that in the next step.


6. Now draw together the part by holding it with a barrette, a decorative comb, or any other hair accessory that will do the job.  I'm using a France Luxe tige boulet barrette in the Elysee design.  It was sent to me by a dear friend as a surprise, and it suits the Gibson Tuck quite nicely.


You're done!  Here is another view of the completed style.  Some people might want to do away with the flyaways, but I actually like them.  It gives a romantic touch to the style. If you do want a neater look with no flyaways, brush your hair lightly with a bit of hairspray to hold them down.

Wednesday, May 12, 2010

Hairstyle How-To: 4 Strand Box Braid

Most of us can do a 3 strand braid without too much difficulty. The idea of learning how to do 4 and 5 strand braids is both intriguing and sometimes daunting.  I know it was a daunting idea for me, even 3 years ago.


I am one of those people who is truly all thumbs.  My typing is slow, my fingers aren't nimble--I feel as though I have no dexterity.


Yet, I was so charmed by the look of the 4 strand box braid and the 5 strand flat braid that I made it my business to learn how to do them, no matter how long it took.


I started learning each braid by doing it as a half-up braid.  Having less hair to work with seemed to make it much easier.  Also, doing a half-up allowed me to have a decent sized braid with more plaits than if I tried to braid the length of my hair.


It took me at least a week to learn the 4 strand box braid. It was really something new to try to figure out the fingering, even though I had the pattern firmly in my mind.


I remember that I would attempt making that 4 strand braid, and I would get a few rounds into it and then make a mistake.  I would then start over.  As soon as I felt the least bit frustrated, I called it quits for that day.


Yet, day by day, my fingering got better.  The muscle memory was beginning to get there.  Finally one day I made that 4 strand box braid in a half-updo!  After that, I knew how to do it forever.


The pattern for the box braid is very easy. It's a really nice looking braid because it has a 3-dimensional quality. 


1. Divide the hair in 4 equal strands.  


2. Mentally number the strands from left to right: 1, 2, 3, 4.  


3. Take strand 1. Bring it under strands 2 and 3 and then over strand 3.  It will now sit in the strand 2 place.


4. Take strand 4.  Bring it under strands 3 and 2 and then over strand 2.  It will now sit in the strand 3 place.


5. Rename the strand again from left to right, 1, 2, 3 and 4.  Repeat steps 3 and 4 until the braid is done.


If you have trouble with this, don't worry.  You are using fingering that you're not used to.  Yet I guarantee that with practice, anyone can do this.  You just need patience, and don't be frustrated if you don't learn it in a day.


Once you learn it, you will be able to start doing it in a French style too.  


Here is a photo of my 4 strand box braid half-up. It is held with a Scunci Ouchless Invisible elastic.  They're made of silicone, and I find them to be quite hair friendly, although they need a bit more care to remove than the regular Scunci elastics that I talked about earlier this week.


Have fun braiding!

Monday, May 10, 2010

Hairstyle: Faux Coiled Braid--First Attempt


Today I tried this hairstyle for the first time.  I call it a "faux" coiled braid because it's actually 3 separate braids, one coiled around the other.  I'm surprised at how big it looks, even at my current length.

This is a surprisingly easy style to do.  It simply requires making 3 single braids, one under the other.  Then I coiled the top braid and pinned into place.  After that I coiled the braid immediately underneath it around the first coil.  The bottom braid was then coiled and pinned around that.

Since this was my first attempt, it's not as neat as I'd like, but I want to post a photo anyway. 

I'm fairly pleased at how this turned out and how easy it is.

I'll post a tutorial with photos in a future entry.

Thursday, May 6, 2010

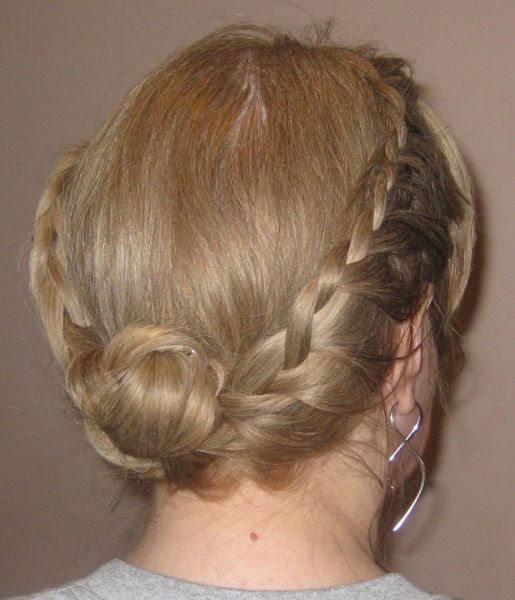
Hair Style: Boho Nape Knot

Today I'm showing a photo of a boho-style nape knot. 


I lace-braided each side of the hair, and then combined the sides with the rest of my hair.


Then I made a loose braid.  After that, I rolled up the braid and pinned it into a chignon, or low bun.  


This is a quick and easy hairstyle, provided that you can lace-braid.  I originally learned how to do this braid from the book Beautiful Braids.  When the braid is done in the manner of this styles, it's also known as the Face-Framing braid.  Lace braiding is similar to French braiding.  The only difference is that instead of adding hair to both the inner and outer strands of the French braid, you just gather new pieces of hair from the side closest to the face. These pieces are added to the outer strands of the braid.


I'll be adding this to my Updo Gallery on my website when I get some better photos.  Or maybe it should go in the Braids Gallery.  I'm not sure.


I hope you like this casual updo.  It's a great look for summer, and very comfortable.

Monday, April 26, 2010

Hairstyle How-To: Flipped Braid

This is another extremely quick and easy hairstyle.  It's so simple that it almost doesn't need instructions. It's also a great "convertible" style, as you can choose to begin your day with a simple 3 strand braid, and if you want to comfortably get the hair off of your neck, you can do this styles in the blink of an eye, provided that you have a hair clip, hair slide or a large barrette.  Here are the extremely simple instructions:

1. Make a single regular braid at the back of the head.

2. Flip braid up.

3. Tuck the braid's tassel under the braid.

4. Hold in place with the hair accessory of your choice.  I chose to use a Ficcare Ficcarissimo in the Eggplant colour.  The Ficcarissimo will hold that braid in place all day.

So that's it!  If you can make a braid and you have even a simple hair accessory, you can do this style in seconds.  This is a favourite for warm days that become hot days and it has a simple but classic look to it.

If you have some layers and bits stick out of the braid, don't give it a second thought.  This is one of those styles that doesn't need to look perfect.

Thanks to everyone for your kind comments yesterday regarding my instructions on how to trim your own bangs or fringe.  They're much appreciated.

Monday, April 19, 2010

Hairstyle How-To: Peacock Twist

This is a quick and easy hairstyle for people with shoulder-length to lower mid-back length hair.  It's a great first updo for when you're first growing out your hair.  Even at my length, I've just about grown out of it.  There are different ways to wear it, whether you use different clips, or whether you finish it by fanning the ends out, bending them to one side, or dividing them in two to both left and right.

On my hairstyle site, I've had several people write and request instructions for this style, so I'll give them in this entry. As I mentioned, my hair has gotten just about too long for it, but I'm adapting.

Here are the instructions:

1. Brush hair back and hold it as if ready to make a ponytail.

2. Twist hair several times in a counter-clockwise direction.


3. Pull twist upwards while twisting some more.


4. With right hand, grab a jaw clip, beak clip, French Twist comb, or the hair accessory of your choice.  I have chosen to use a medium Ficcare Innovation Beak Clip in Pink Marble.


5. Insert clip.  Arrange ends to the left as shown below.
6. Or for a traditional "peacock" look, clip a bit higher, if necessary and fan hair out as shown below.


And that's it!  You've got a Peacock Twist.  It will likely look a bit different every time you try it and at different lengths, and it is a quick updo that can be done in seconds, which can come in very handy.

Another variation would to be to part the ends in two and have them lean both to the left and the right.  Play with the placement of the clip and experiment with how you place the ends.  Have some fun with it!


Wednesday, April 14, 2010

Styling Longer Hair Without Causing Damage

When I decided that I wanted to grow my hair long, I knew that I had to stop using blowdriers, curling irons and hot rollers, if I expected my fine hair to be able to grow without damage.

This was a real challenge for me, as I am all thumbs, and not the least bit good with my hands.  I started trying to learn how to create styles that would not only look interesting, but also protect my hair and not require heat appliances.

The first style I learned was the French Twist.  I had often seen this style, but I didn't think I'd ever be able to do it myself.  But after reading a few tutorials, I was able to do it using just one little pic or comb to hold it up.  I then learned some other styles that worked with my length, such as the Gibson Tuck and a Tucked 3-Strand Braid.  All of these hairstyles can be found in the Updo Gallery of my website.

I had a book that taught me some elementary braids and updos.  I recommend it to anyone, no matter how much you think you may lack talent in styling hair.  It is Hair: A Book of Braiding and Styles by Anne Akers Johnson.  The styles you can learn in this book are the foundations for most more difficult styles that you may want to learn down the line.

As I said in an earlier post, until I was 45, I didn't even know how to use a hair stick.  I always thought that a bun held by a single hair stick was just a trick in the movies before I learned how to do one myself.  How happy was I to discover that it actually could be done!

As I became more and more interested in just what I could do with my hair, I began trying to learn more difficult braids.  I was able to do a French braid, but not much more.  My next project was to learn how to do a Four Strand Box Braid.  It took days for me to get the fingering down and to develop the muscle memory to successfully make this braid.

It took me even longer to learn a Five Strand Braid, but with patience and practice, I did learn how to do it, even a French Five Strand braid.  I think my happiest achievement was learning how to do a Crown Braid.  Again, all of these and more can be found on the Braids Gallery on my website.  All of the photos there can be clicked for larger images.

I've learned a lot since developing a knack for styling my own hair, including what hair accessories work best with each style, and that patience pays off.

In the coming days and weeks, I plan to give some tutorials on how to do some of the various styles I've learned, as well as discussing my favourite hair accessories, and what makes them superior to others.

I'm not the best stylist in the world, but I've been able to do things with my hair that I never thought I'd be able to do.

If I, who am not a dexterous person, can do it, so can you!  I'll leave you with a photo of the first style I learned, the French Twist. It is held in place with only a France Luxe Chignon Pic in the colour "South Sea".

Monday, April 12, 2010

Hairstyle: Rope Braid Half-Up


Today I'm wearing a rope braid half-up. The rope braid is one of the easiest braids to make, but one of the most eye-catching. People always notice a rope braid and often are fascinated by it.

I first learned how to do a rope braid with written instructions, and I found it easy to do. I'll give some quick instructions.

Part hair you would for any half-updo. Divide that hair into two equal strands. Take the strand on the right and twist it in a clockwise direction or, in other words, to the right. Cross it over top of the left strand. You will be crossing the hair over to the left, or counter-clockwise. Now the original left strand in your new right strand. Twist this strand to the right and cross it over to the left. Repeat until the braid is done.

So in brief:

Twist to the right.
Cross over to the left.
Twist to the right.
Cross over to the left.

Keep it going until you have run out of hair to twist, tie off the end of the braid with a hair friendly tie or elastic, and you're done. Prepare to be asked about your braid.

Rope braids are also a base for a beautiful bun, which I'll post another time.

In the meantime, you can take a look at this and some of the hairstyles I've done in the past at my website, http://www.frannyslonghairstyles.com/